
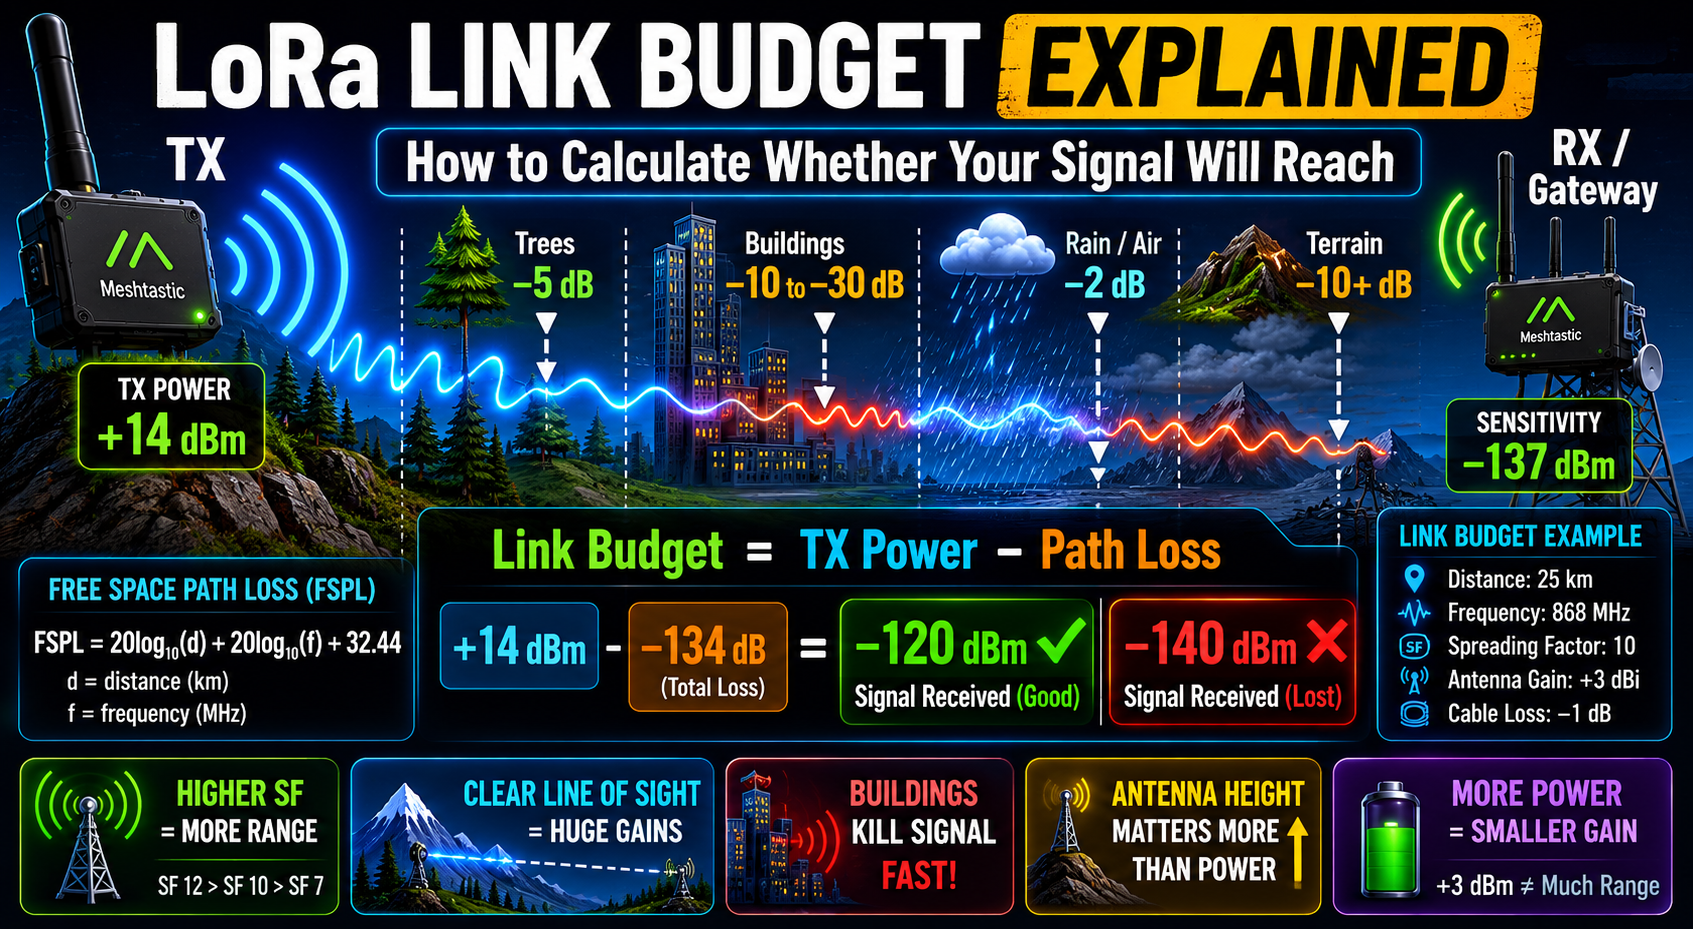
You place a LoRa node on a rooftop and wonder: will it reach the device three kilometres away, behind a row of houses? Or maybe you're planning a deployment across a valley and trying to figure out whether you need a repeater. The question is always some version of the same thing: will the signal actually get there?
That is exactly what a LoRa link budget calculation is for. It is a structured way of adding up all the signal gains and losses between the transmitter and the receiver, then checking whether enough power remains at the other end to be detected. If the answer is yes, and by how much, you have your link margin. If the answer is no, you know where to start fixing it.
You do not need to be a radio engineer to work through one. The maths is just addition and subtraction.
The basic idea
Your transmitter sends a signal at a certain power level. That signal picks up a little boost from the antenna, loses a huge amount of power as it travels through space, and then (hopefully) arrives at the receiver with enough strength to be detected.
The receiver has a sensitivity threshold, the minimum signal power it can decode. If the arriving signal is above that threshold, the link works. The difference between the arriving signal and the threshold is the link margin. More margin means a more reliable link.
A link budget is just the calculation that gets you to that number.
The four numbers that matter
For a simple LoRa link, you need four values. All of them are in decibels, which means you add and subtract rather than multiply and divide.
Transmit power. This is how much power your radio puts out, in dBm. Most LoRa devices in the EU transmit at 14 dBm (25 mW), which is the legal limit for the 868 MHz band without duty cycle restrictions. US devices on 915 MHz can go higher, up to around 20 to 30 dBm, depending on the specific rules and hardware.
Antenna gain. Antennas do not amplify power, but they can focus it in useful directions, which has the same practical effect. A basic dipole antenna adds about 2 dBi of gain. A directional Yagi or high-gain omnidirectional antenna might add 5 to 9 dBi. You count the gain at both ends: transmitter and receiver.
Path loss. This is the big one. As radio signals travel through free space, they spread out and weaken. The further they travel, the more they lose. At 868 MHz over 1 km of open air, you lose roughly 91 dB. Over 5 km, about 105 dB. Over 10 km, around 111 dB. These numbers assume nothing is in the way, which is never quite true, but they give you the baseline.
Receiver sensitivity. This is where LoRa earns its reputation. A LoRa receiver using the slowest, longest-range spreading factor (SF12) can detect signals as weak as around -137 dBm. That is extraordinary. For comparison, a Wi-Fi receiver typically needs about -90 dBm to function. LoRa's sensitivity is one of the main reasons it reaches so far on so little power.
A worked example
Take a realistic scenario: two nodes 5 km apart with line of sight, both using stock dipole antennas, operating at 868 MHz in the EU.
Tx power: 14 dBm
Tx antenna gain: 2 dBi
Free space path loss at 5 km: 105 dB
Rx antenna gain: 2 dBi
Receiver sensitivity at SF12: -137 dBm
Received power = 14 + 2 - 105 + 2 = -87 dBm
Link margin = -87 - (-137) = +50 dB
That is a massive margin. In ideal conditions over flat terrain, LoRa can reach far further than 5 km before the link gets close to failing. This is why people regularly report 20- or 30-km links from elevated positions.
The margin is your safety buffer. It accounts for all the real-world losses that the free-space calculation does not.
What eats into the margin
Free space path loss assumes nothing is in the way. Real environments are messier.
Buildings and walls add a significant loss. A signal passing through a brick wall might lose 10 to 15 dB. Through a reinforced concrete structure, 20 to 30 dB or more. Dense urban environments can knock 20 to 40 dB off your link budget before you have even gone very far.
Trees and vegetation are worse than people expect, especially when wet. A kilometre of dense woodland can absorb 10 to 20 dB.
Hills and terrain cause the most dramatic failures. LoRa signals travel in roughly straight lines at these frequencies. A ridge that cuts the line of sight can wipe out the link entirely, not just reduce the margin.
Cable losses matter too, particularly on longer antenna runs. Coaxial cable has a measurable loss of roughly 0.5 to 3 dB per metre, depending on the cable type and frequency. A 5-metre run of cheap thin coax between a node and a rooftop antenna could cost you 5 to 10 dB. That is significant when your margin is the thing keeping a marginal link alive.
Spreading factor changes the sensitivity
LoRa lets you trade data rate for range by adjusting the spreading factor. Higher spreading factors mean slower transmissions but better receiver sensitivity.
SF7 gives you roughly -123 dBm sensitivity, the fastest setting. SF12 gives roughly -137 dBm, the slowest. Each step up in spreading factor adds about 2.5-3 dB of sensitivity improvement.
Going from SF7 to SF12 gains you about 14 dB in the link budget. In the worked example above, that shifts the margin from around 36 dB to 50 dB. It does not change whether the link works in good conditions, but it makes a real difference when conditions are marginal, or obstructions are eating into your budget.
Meshtastic uses SF11 on the LongFast channel by default, which sits close to the maximum sensitivity end of the scale without going all the way to the slowest setting. A sensible choice for a mesh network where the goal is reliable coverage rather than speed.
What the calculation cannot tell you
A link budget is an estimate, not a guarantee. Free-space path loss is a baseline, and the real world constantly deviates from it. Atmospheric effects, multipath reflections, interference from other devices, and seasonal vegetation changes all shift the picture in ways the formula does not capture.
The link budget also assumes the antennas are properly matched and positioned. A mismatched antenna, or one that is poorly oriented, can waste several dB of gain that your calculation assumed was present. This is one of the most common reasons a link underperforms relative to the numbers.
Use the calculation as a planning tool and a diagnostic guide. If a link that should have a comfortable margin is failing, the budget tells you where to look: how much you're losing to obstructions, how much to cable losses, and whether the antenna is actually performing to spec.
The levers you can actually pull
For most LoRa and Meshtastic deployments, you have more margin than you think in open or semi-open terrain. The genuinely hard cases are dense urban environments, basements, or paths that cut through substantial terrain.
Transmit power is capped by regulation, so there is a ceiling there. Antenna gain is the most cost-effective improvement for a fixed node, and it applies at both ends. Antenna height is often the single biggest practical gain, since going above obstructions dramatically changes the path-loss calculation. Spreading factor trades speed for range if you need to squeeze out more sensitivity. And sometimes the right answer is a repeater node on a hilltop when a direct link simply cannot work.
Running a quick link budget before deploying a node is not about proving the maths works. It is about catching obvious problems early, knowing which factors you have room to trade against each other, and understanding why a link is marginal when one turns out to be. The signal either gets there or it does not, and now you have the tools to figure out which before you climb on the roof.